Monthly Archives: June 2011

My first attempt at carving an egg

Unfortunately it broke right before I finished! I did my best to salvage it so I think all things considered it still turned out alright. After the break are a couple more pictures as well as some info on the “fool-proof” method I came up with for doing these.

(Continued)

Etsy Scares Mr. Geode Mouth!

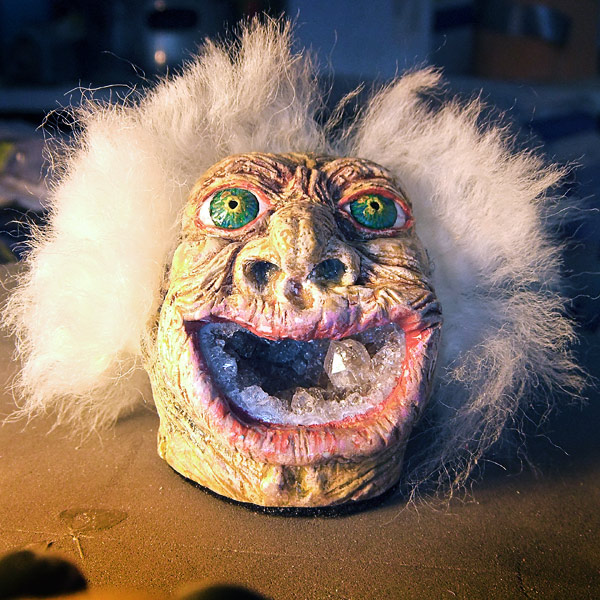
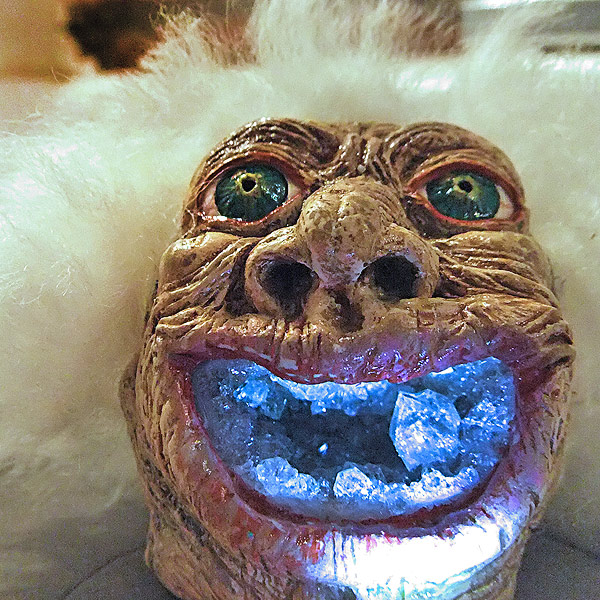
In today’s entry I want to share with you a guy that I made a couple weeks ago but have only gotten around to photographing now. I got a cheap grab-bag full of low grade geodes (twenty halved and polished geodes, roughly 1.5″ across on average, for about $20) and have been thinking of fun things to do with them, and the first thing I came up with was using the geode as a mouth for a funny character. I made this fellow using an Oco geode from Brazil that had a nice big quartz snaggle tooth. I sculpted the face in “Aves FixIt” (a two-part epoxy clay) and the hair is a section of a sheep hide that I got at Ikea. I glued the leather to the clay, and then sculpted a small lip over top of the edge of the leather in order to hide it. This was quite successful, and the original hair was totally crazy looking and very long, but in the end I cut it to a third its initial length and added a hat, mostly to keep the hair from being the focal point.
But why, you ask, does Etsy scare Mr. Geode Mouth? Well, do a search for “Geode” on Etsy and the results are quite remarkable. Sure, there’s a lot of junk on Etsy, but there’s also an incredible variety of beautiful handcrafted jewelry. The part that I have a problem with most of the time though is the cost. Not that it’s too high — but that it’s too cheap. It really upsets me when I look at these artisans creating stunning jewelry that shows both technical expertise and a wisdom about art that comes from a master at work. I look at them and I do the math in my head, adding up the cost of the supplies I see them using, about how many hours it would take to create, and it’s obvious that they’re often lucky to be making minimum wage. Nothing even close to approaching a living wage. And if they’re handmaking the stuff, it’s not like they can offset a low profit per piece by selling a thousand a day. It’s not humanly possible (don’t get me started on people scamming Etsy with Chinese mass-crap masquerading as homemade — those stores make me sick, and the fact that Etsy won’t deal with that disease makes me even sicker).

It makes me sad to see people with such talent and creativity selling their creations for so little. I can’t help but conclude that Etsy shares some of the blame there, because of the role it has played in forcing absolutely cutthroat pricing on handcrafted items. It’s unfortunate that the market has not been able to accept that one should be willing to pay a premium for handmade items, and instead has created a status quo where people expect them to come in at lower pricing than mass-manufactured items. Fine jewelry should be a fair exchange for a valuable commodity, not “a steal of a deal”. That said, if you follow the first link I posted above, you will find plenty of jewelers well worth supporting at said steal of a deal. From time to time I consider running a store because I make so many things that I’d love to find homes for, but I really don’t know if I feel like taking place in such a market. Plus I don’t need hate-mail from ignorant shoppers begrudging the fact that I’d only be willing to price things without devaluing my time and abilities. But anyway, back to my silly geode dentistry.
Oh and while I remember, I had a nice day today, spending the whole thing (about six hours anyway) at the park working on a fun but top-secret project. When we got home I started making the molds for an awsome chess set project that Nefarious created. I was cutting the plaster mold backings off with a hobby razor knife, and when I was done I noticed that my right pantleg was drenched and dripping with blood. At some point my hand must have slipped and self-stabbed but I didn’t consciously sense the injury. It wasn’t deep enough to be dangerous, but it was deep enough that you could see fat cells in the open wound. I called Nefarious down for an anatomy lesson (“you are so gross daddy!”) and showed her how to close the wound with superglue. If I’d gone to the hospital I know I would have walked out with four or five stitches and far too much boredom from the wait. I’ve got enough scheduled hospital time this week without adding more for stuff that I can just deal with myself! Once I started working with the wound I became aware of it, but the “amusing” thing is that I didn’t notice it otherwise — the pain of getting a nasty stab wound is so much less than the constant ache in my legs that it’s below my threshhold and doesn’t score high enough to get my attention.

To finish up, I’ve got some other geode projects on the go that I’ll post another time, including more in the theme of this post, experiments in adding glow-in-the-dark elements to create self-illiminating “radioactive” geodes, as well as active lighting by drilling the geodes and mounting internal LED lights. If you’d like to see a few more pictures of this character, there are a whack more after the break. Nefarious is out of school for the summer so I am going to try and spend some more full days at the park like we did today — I’m sure it’s healthier for me to bring my reading or sculpting or writing or whatever (or even napping!) to the park instead of staying here at home on the couch. The fresh air can’t possibly be a bad thing, right?

(Continued)
Quick DIY: Sink Water Fountain Conversion

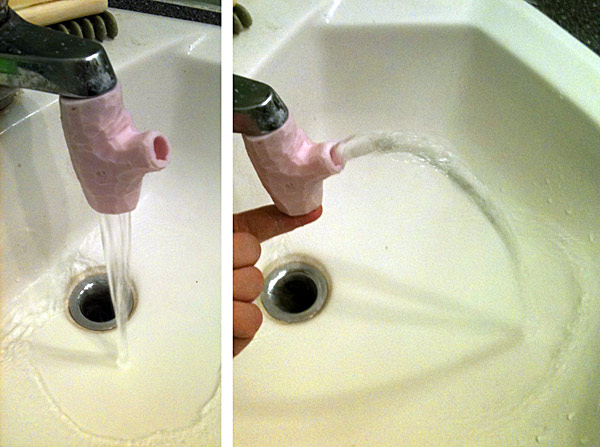
Like many kids (and adults), my daughter regularly takes drinks from the tap. I have to admit that this grosses me out. I’m sure it’s not that terrible, but drinks without germy lip contact would be much nicer. Caitlin was gifted a silicone “splitter” for her bathroom sink where if you squeeze the bottom hole closed, it sprays water upwards, making some kinds of cleaning up easier I guess. It also comes close to being a water fountain, but because it sprays pretty much straight up, the angle isn’t quite right. So I figured that since I have buckets of silicone putty here it would be a simple matter to whip one up that worked better.

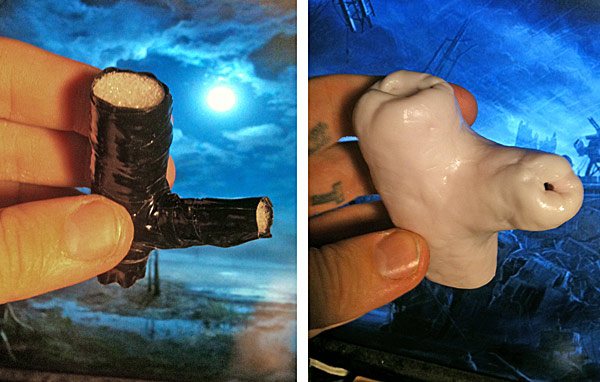
I started by making the inside of the pipe out of packaging foam wrapped with electrical tape (ie. creating the space that the water flows through, as a male mold, which is a technique I rarely need). Then I took some silicone putty and squished it around the buck. Looks kind of deviantly grotesque I think.

When the silicone had hardened, I pulled out the foam with needle-nosed pliers. Then I tried to make it a little less ugly by trimming the silicone with a hobby razor knife. If I really cared it would be easy to make a fancier mold with a pretty finish and I could dye the silicone as desired, but that’s not the point. The point is, as you can see, it works perfectly. The angle is ideal, exactly what a water fountain should be. Success!

Today is the very last day of school, so this afternoon I’ll go and watch the end-of-year concert and student variety show, and then I will have to start thinking of fun projects to fill the days with. Nefarious has been going to water skiing camp on the weekends for the last month, but she’s still too young for a summer leep-away camp, and to be honest, I think I would feel like I was missing out if she disappeared for two weeks. I’ve got a full entry I want to write on the subject, but I was just telling my doctor that I think that my awareness that I don’t have that much life left in terms of raw time is actually a good thing. I have accepted my demise and I don’t fear it, so being cognizant of how little time is left makes me value every day, savor every moment of joy, and try and do as many interesting things as possible while I still can.

Not that the above is terribly interesting, but you know, small steps, right?

Dog Skull Wireless Mouse Case Mod

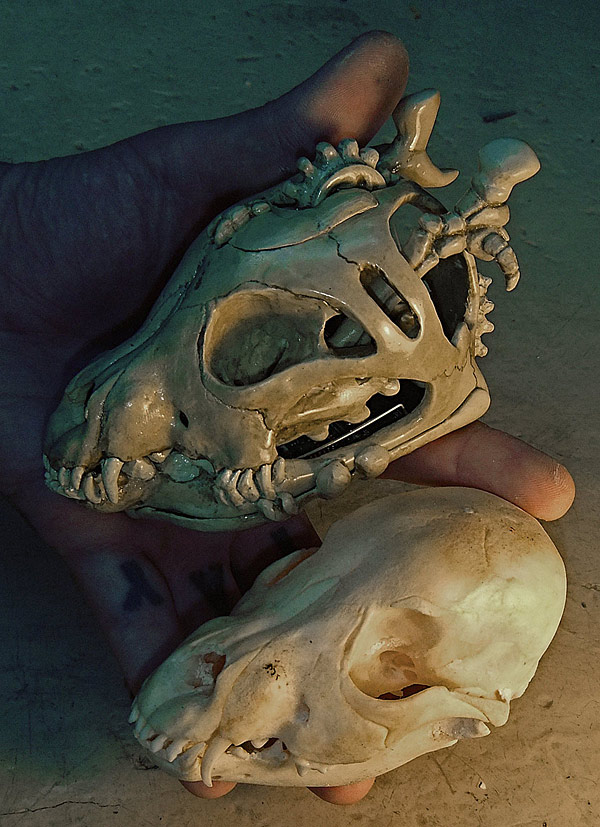
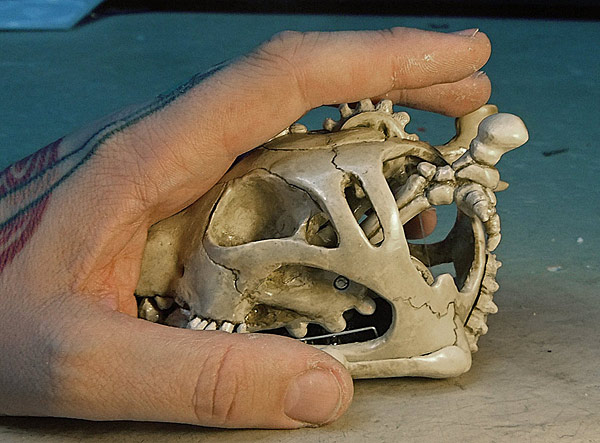
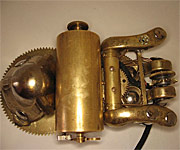
I’ve had the pieces lying here for a few weeks now but until yesterday haven’t had a chance to complete the assembly on my major mouse case mod, mounting the guts of a wireless mouse inside a sculpted dog skull. I had gone to Future Shop to buy myself a new mouse and they were clearing out the Logitech V220 for $9.99 (the new model, which seems identical other than having a smaller dongle, had come in). It’s fairly compact, and uses a single AA battery for power, so I thought it would be an ideal (and low-investment should I brick it) platform to try and do some mouse modding. Over the next few weeks I created a new enclosure and mechanics using a mix of cast plastic and sculpted parts and Mechano (the metal parts) to build it, and then finished it off with hand painting.

I’m very thrilled with how it turned out, so, without further ado:

All the pictures in this entry (and after the break there are a small mountain of them) can be clicked on to see it bigger. Let me also show you how nicely the skull fits in my hand. I have a small collection of skulls here, so after looking at which would fit the electronics I picked the one that was the most ergonomic. Assuming you don’t recognize the animal without flesh, that’s the skull of a small dog, and in the picture above you can see the real bone skull that I used as my master.

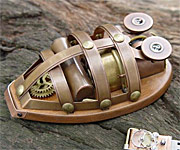
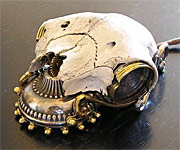
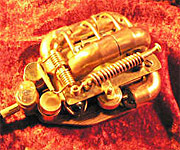
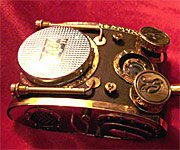
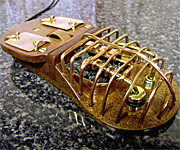
I’ve actually wanted to do a mouse mod for quite a while. There seem to be far less modded mice, but there are some absolutely stunning steampunk mouse creations out there that were an inspiration to me. I’d like to give credit where it’s due, so here are some links to other projects that I liked a lot. Click the thumbnail to jump to the site.

Impressive stuff!!! Of course google can show you more although it’s a little flooded with instructables on how to dye your mouse and other things that aren’t really true case-modding to the extent I was interested in (you may enjoy a moment of schadenfreude at the pretentious tantrum thrown by a hilarious “artiste” foolishly defending his mouse covers — mouse clothing perhaps — as something of earth-shattering importance to those who understand “art”). Those people are quite a bit more talented than I am, or at least more experienced. This is the first time I’ve ever done anything like this though, so I think I did well all things considered. I also bit off a bit more than I had to by going with a wireless mouse. If I was going to do it again, I think I’d go with a cabled mouse because it’s much simpler hardware. On the following page I have included many more shots of the finished project, as well as individual pictures of the dozen or so parts, and some of the build process as well. Hope you like it, and either way, I had lots of fun making it.

By the way, I have zero experience doing metalwork, so I wasn’t going to tackle the very nice brasswork that really put some of the other projects I just linked over the top. Nor am I particularly good at soldering so I was operating with the limitation of not being able to move the switches around and so on. But with those limitations in mind, I think I pushed my technique about as far as I could. Maybe I’ll get ambitious and take molds off all the pieces and do a run of these if there is serious interest, but I suspect it will remain a one-off.

Click to see lots more, but be warned — there really are a lot of pictures in this entry!

(Continued)

Finger Casts + Ultra Glow-in-the-Dark Plastic

Preface: A whole-hearted recommendation for Glow Inc’s glow-in-the-dark powders! I ordered some of their “Ultra Green v10″ as well as some blue and orange glow powders, with the intent of mixing them into my plastic work, and I don’t think I’ve ever seen this bright a pigment. My first few experiments have yielded glow plastics that are so bright you can see them in daylight (I don’t think I’ve ever seen a consumer accessible product that can do that), and at night they release enough glow that you can actually read a book by them. Making that even more impressive is that the glow keeps on radiating for over 24 hours in the dark (although not as brightly of course). The other colors aren’t as bright as the green, but they’re still super-saturated and quite beautiful. One of the most fun bits in my growing crafter/maker arsenal.

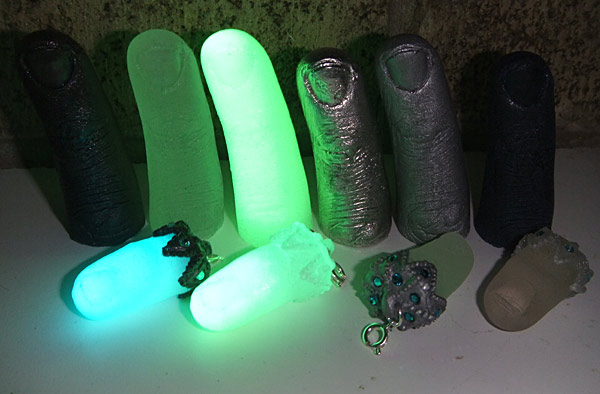
Let me begin by showing you some of my recent finger casts (with the mold being made in all of four minutes using silicone putty squeezed over a digit), most of them done in Smooth-Cast 325. Even though the manufacturer says that it’s “clear amber”, I think its natural color is closer to a smokey transparent with a hint of blue, but either way it picks up additive powders’ color well. From left to right, the top row below are nickel powder (not black), untinted/clear plastic, ultra green v10 glow powder, pewter (very heavy and thankfully I’ve eliminated the bubble problem), silver powder, and blue dye. The bottom row, also left to right, are ultra blue powder with a nickel powder cap, ultra green v10 powder, clear with a silver powder cap, and clear throughout.

That photo was taken in quite dim lighting but not darkness, and you can keep reading for other conditions. I also want to point out that none of the pictures here are manipulated for brightness. They’re as they came from my camera without any exaggeration. By the way, all of the pictures in this entry can be zoomed into by clicking on them.

And as always, do forgive me for textual errors as I just don’t bother proof-reading any more, sorry…

But yeah… I’ve included lots more pictures, including some taken completely in the dark (other than the glow of course) that are amazing given how badly my camera handles low-light, after the break. I wanted to mention though that the nickel parts didn’t photograph well — in reality it looks like a dark gunmetal, black in the grooves and dark silver on raised ridges. The blue plastic (ie. top right) looks rather black in the pictures but it’s rich deep dark blue that my camera avoided. If it wasn’t for the 3D capabilities of my camera I’d spend more time bemoaning its quality because it seems like Fuji figured people would pay double for a camera that does everything worse than most point and shoot if it just has that gimmick.

Anyway, more after the break.

(Continued)