I wanted to update everyone on my leg pocketing. Since first writing about it, I have done two more pocketings above the first one using an identical procedure and, currently at least, identical 2ga (1/4″ diameter shaft) silicone jewelry. The first piercing has some issues with dry skin, but as you can see, my whole horrid right leg has this issue in that area and looks like dried up scar tissue. This is because of the neurological damage, not the pocketings. It’s also why the hair doesn’t grow properly in that area. I’m afraid to admit that my leg was super-gross to begin with, which is also part of the reason why I had absolutely no worries about this experiment. Not like anything could make it worse — it could only stay the same or get better, and I think it got much better.
Without further ado, here are three pictures as of last night. The bottom two are glow in the dark silicone, and the top one is just regular silicone, cast by me. It’s not technically implant grade, but it is FDA approved for food use. Of course, using it on myself is ethically very different from using it on others, so I am fine with that rating. Not for the squeamish!
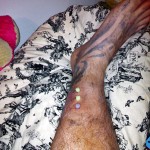
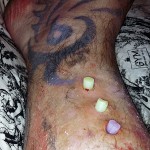
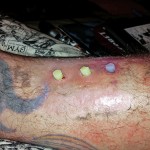
As you can see I am still perfecting the placement of the top two and the angles need a little work. I’ve found that there is a little room to play there, and my using a very slight pressure bandage nudging them over I can get them to move enough to be in alignment with each other — I know it works because I did it with the bottom one. Here is a photo of how I do that by using bandages to “push” them into place.
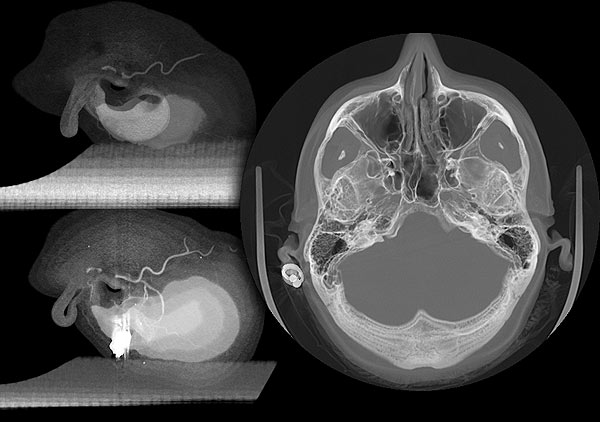
I’m still debating what the best jewelery is. For short term and healing, I like this silicone stuff a lot, and it’s also nice because it can be banged without causing damage. It can also be removed and replaced easily to inspect the healing, and I suppose I could also easily make pressure fit caps for it if I wanted something decorative. However, I am also debating something very close to 2ga microdermals (anyone able to manufacture these, as I don’t have a jeweller’s lathe?). The reason I am considering that is I like the idea of wearing flesh tunnels that create a negative space inside my leg. Here is a picture of what I have right now, and what I’m thinking about:
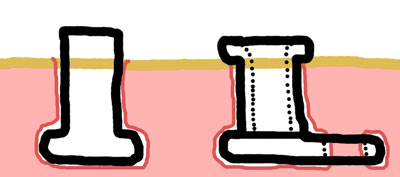
The obvious problem with that jewelry is that it would be semi-permanent since like a microdermal, it would become anchored in place. That’s both a problem and an advantage for obvious reasons, but knowing me, once I have what I like, I won’t be swapping the jewelry out.
Finally, in my first entry about this I briefly mentioned the procedure, but now that I’ve done it twice more I feel confident that it worked well for me so I am going to describe it in full. Again, this isn’t for the squeamish and I wouldn’t suggest this to anyone who is not very in tune with their bodies and experienced with the safe limits of procedures as well as experienced with identifying infection and other problems, because this definitely plays close to the edge.
I begin by using a #11 scalpel to make an incision perpendicular to the skin, straight down into the tissue to about a 1/2″ depth. This is replaced with a sliver or spike of carved wood or bamboo (for example out of a disposable chopstick) about 5/8″ to 3/4″ long and roughly 8ga or maybe a little larger in diameter with a dull edge or point on the end. This is pushed into the hole and held in place with a light pressure dressing which will cause it to settle at a comfortable depth. It should not be particularly painful. In a way this is similar to indigenous body piercing methods. I believe the reason it works is that your body’s defenses react to the wood, a non-inert organic material, and begin a process of pulling away from it and building up a protective layer around it with safe natural discharge that acts as lube — this is not the same as pus from an infection although, especially mixed with a little blood, it may seem that way. It’s how your body responds to threats such as slivers. Within 12 to 24 hours this can be replaced with a slightly larger silicone plug of the same general design. I used a fairly hard formulation for this initial phase, but it’s still much softer than the wood which I feel is important so as not to do damage to the subcutaneous tissue. It should only take two to three steps of progressively larger diameter jewelry to reach the final 1/4″ size (and I don’t see why a little larger wouldn’t work if you want). There may be quite a lot of discharge during the first 48 hours, and there may be some minor discomfort and heat in the area but nothing major and I experienced no indications of infection or other complication. After the initial period it will lymph for a couple weeks and then settle down. Oh, and when I’m at the final jewelry size, I made a hard silicone version of the jewelry to “shape” the hole, and then replace it a day later with a soft silicone version, since the softer the jewelry, the less impact it has on the surrounding tissue. Finally, minor adjustments in terms of the angle of jewelry can be made using pressure dressings as I showed in the linked picture above.
Just want to be real clear that this was not a “how-to”! If you’re ready to do something this perverse to your body, you don’t need my instructions anyway.
Hope this is of interest to someone. I will continue to update on this project when relevant.

